How to create a rotating hero banner with Squarespace Auto Layout (no code needed!)
PIN TO SAVE FOR LATER
Squarespace recently added a versatile feature called Auto Layouts which allows you to create slideshows similar to Gallery Sections. The difference being that Auto Layouts allow you to overlay text and buttons on a background image, while Gallery Sections only allow for background images. We love this new feature — it’s a great option to spruce up the hero banners on your site without any coding!
The Steps:
1) Navigate to the page you’d like to add a rotating banner and go into Edit Mode
2) Click blue “Add Section” button
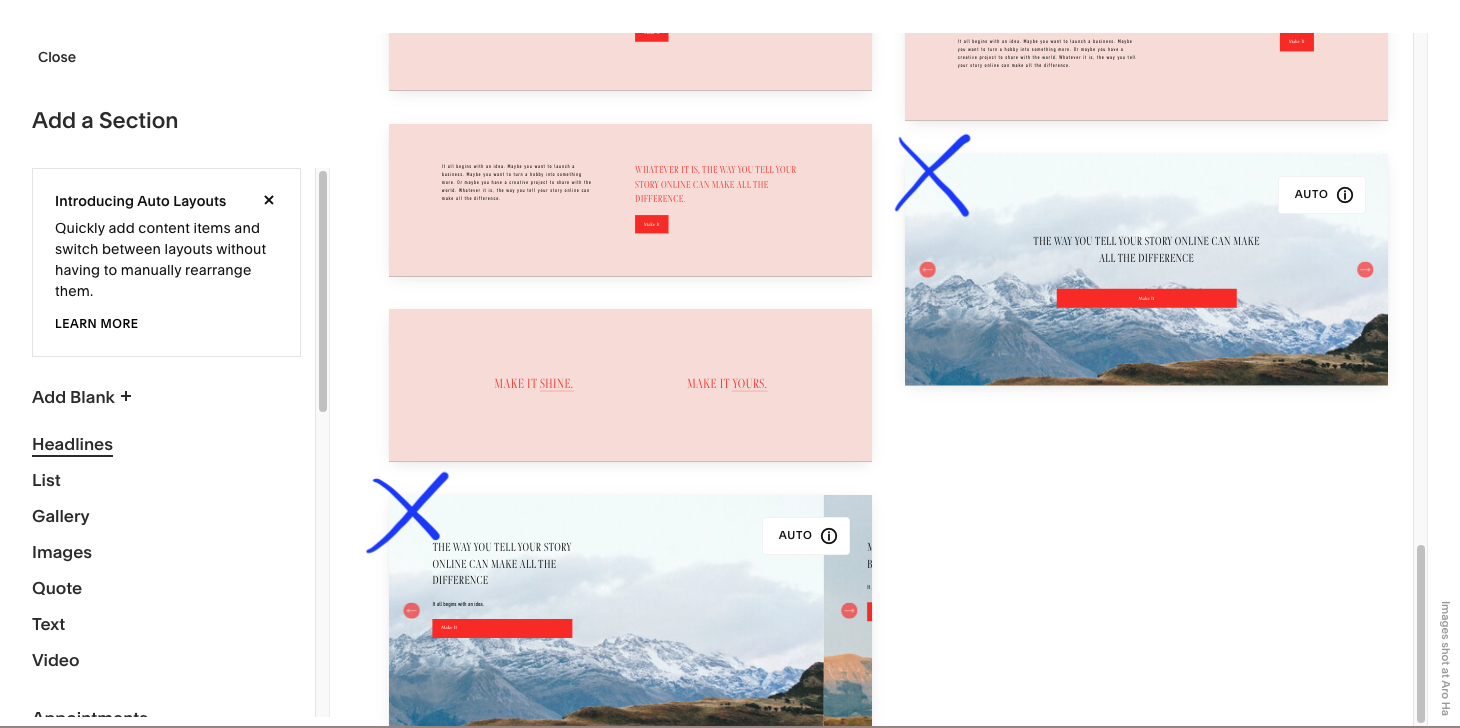
3) Scroll to bottom of “Headlines” and select one of two Auto Layout sections (there will be a badge that says “AUTO” in the top right corner)
*** Option on the left has a small overlap of next section to right. Option on the right is full width. These settings can be updated in the Design tab once the section has been added to the page.
Once you’ve added the section, your page should look similar to this:
4) Hover over section and click on “Edit Content” button found on the top right
5) The Elements tab allows you to control the content that will be showcased on each slide. For a hero banner slideshow, we recommend turning off the title and button under “Section”. If you’d like to include a paragraph under the heading, enable Show Body under “Items”
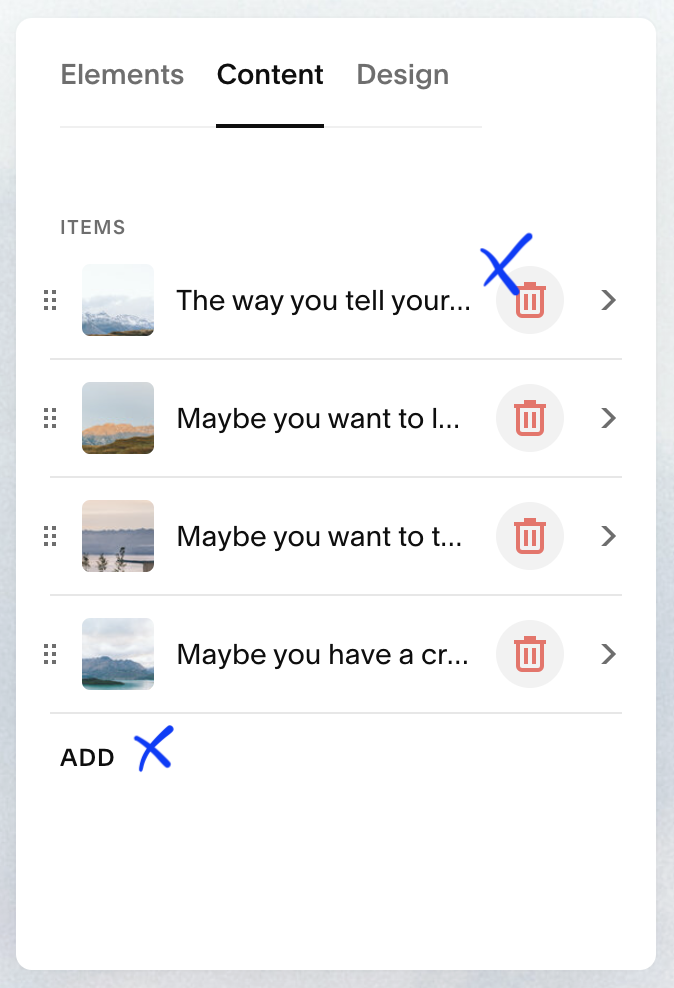
6) The Content tab allows you to add/remove slides and update the content on each slide
7) To update the content on a slide, click on the slide > upload a new background image and update the title/description
8) The Design tab allows you to update layout width, padding, alignment, and overall slideshow styles. We recommend playing around with these settings to see what works best for your specific website!
Important note: make sure “Banner Slideshow” is selected at the top of Design tab
9) To update slideshow colors, hover over section and click the pen icon > navigate to Colors and choose scheme of choice. To further update the color of a specific element, go to Site Styles and update as desired
Add an automatic rotation to Squarespace auto layout slider with Javascript
Go to: Settings > Advanced > copy & paste javascript below in the Header Code Injection
To update the slide duration update the number 4 (4 seconds) to desired timing on line “timing = 4,”
Eg. for a 10 second rotation, update javascript to “timing = 10,”
<script>
  (function(){
    let playInBackend = true,
        timing = 4,
        section = '',
        direction = 1;

function AutoScrollLayout(e){e=""==e?document.querySelector(".user-items-list-section"):document.querySelector(e);let t,n,o,i,c,r=!1,s=e.querySelectorAll('button[class*="__arrow-button"]');function d(){t=setInterval(u,n)}function u(){o=document.querySelector("body.sqs-edit-mode-active"),i=document.querySelector(".sqs-modal-lightbox-open"),r||o||i||!c||s[direction].click()}n=1e3*timing;if(document.addEventListener("visibilitychange",function(){r=!!document.hidden}),["mousedown","touchstart"].forEach(t=>{e.addEventListener(t,function(){r=!0})}),["mouseup","touchend"].forEach(n=>{e.addEventListener(n,function(){r=!1,clearInterval(t),d()})}),window.IntersectionObserver){new IntersectionObserver((e,t)=>{e.forEach(e=>{c=!!e.isIntersecting})},{rootMargin:"-75px 0px -75px 0px"}).observe(e)}s[direction]&&d()}window.addEventListener("load",function(){let e=new Array;e.push(section),section.includes(",")&&(e=section.split(",")),e.forEach(e=>{(window.top==window.self||window.top!==window.self&&playInBackend)&&new AutoScrollLayout(e)})});
  }());
</script>


